Monday, July 13, 2020
Bunnies, bugs and dry heat in the garden
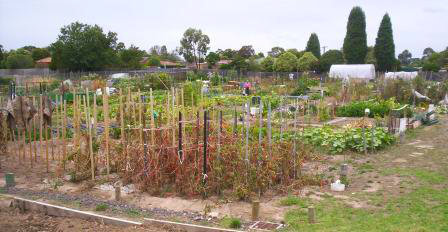
Ick, what a week! First I realized that with the recent high temps and arid winds, I haven't been watering enough. Stuff was getting crispy. Daily hand watering just wasn't cutting it out here on the plains. So I've switched to twice daily and started using a sprinkler, being sure to rotate it for coverage.
Ya, you heard me. It's an incredible amount of water but the dry winds make it a necessity. Next up, discovered an infestation of squash bugs and while treating them to a dose of homemade insecticide and trimming off damaged leaves also found.... Earwigs! Ewww! I always thought earwigs loved moisture. No idea why they were running rampant in my arid garden but....
Good news, the vinegar spray annihilated the earwigs. Unfortunately, I still have squash bugs. So moving on from vinegar, soap and water to rubbing alcohol, soap and water. I hope it works! I love having bunnies in my yard. So, rather than battling them, I put all the bunny food plants in higher raised beds they can't reach. Or so I thought. LOL
Those cute little buggers somehow managed to scale 2 foot high beds. They didn't burrow under them. Just hopped up and burrowed down to harvest my baby carrots and new potatoes. Left a couple huge, rabbit size holes.
Pretty sure they're not going to quit. Fence is not an option, the way the beds are set up. So we'll probably have to harvest a little early to beat them to it. Oh well, we like baby carrots and new potatoes anyway.
Oh, here's a funny thing, I thought my radish and beet sprouts were disappearing due to the sun drying them up. Nope. Turns out, the birds think I'm planting food for them as well. Just happened to look out and saw them chowing down on my third planting of both.
Meh, stuff happens. Its all part of gardening fun. Still living happy and healthy in the gradual garden. Just have to be more watchful. Hey, I have time. I'm grounded and isolating for the most part anyway. Happy gradual gardening always at our house, no matter the challenges!
Wednesday, April 29, 2020
Why you should stop buying landscape supplies by the bag
How many bags of soil at 4 bucks a bag
does it take to fill an average sized raised bed? A lot more than
10. One bag doesn't even fill one of the buckets pictured above! And yet, you can get far superior soil from a garden center for
about 40 bucks a yard. That's enough to fill a small truck bed or
half a large truck bed. It will fill two raised beds with a bit
leftover.
If you don't have a truck, many garden
centers will deliver landscape materials to your door for 60-80
dollars. That may sound like a lot but if you need a large quantity,
remember they can usually deliver up to 15 yards in one trip, thereby
saving you gas, time and money.
I can't even fathom how much more 15
yards of bagged soil would cost, not to mention your aching back from
loading and transporting all those individual bags. A delivery truck
will dump supplies right where you need them or close enough to save
you a lot of footwork. No more labor intensive loading and unloading!
Splitting the cost of landscape supplies and delivery with a neighbor or multiple neighbors will save
you even more. The bigger the load, the better your transportation
savings. So why not?
Hubby and I just paid 80. for 2 yards
of eco-friendly compost. The same amount of compost in bags would
have cost over 300. We just don't have that kind of money. Heck, we
barely had the 80 bucks but we knew bags would cost even more and
it's time to get this whole yard garden project started already.
Luckily we do have a truck that holds 2 yards of just about any
landscape material, so transportation was free, other than gas.
Next year, we'll have our own compost
from a pile we just started. That's another great way to save.
Homemade compost can usually be planted in, provided it's not overly
nitrogen heavy. We don't use nitrogen heavy animal waste in ours so
we won't need to buy garden soil or fertilizer ever again. It's an
all in one solution.
If you're not a gardener, you can still
save money buying bulk landscape materials. Mulch, rock and sand are
all far cheaper by the yard than they are by the bag. We highly
recommend mulch or breeze for pathways. It's much lighter than rock
and still pleasing to the eye.
Speaking of mulch, ours was virtually
free. I'll tell you about that in a later post. Until then, happy
gardening! And don't let me catch you buying bagged landscape
material ever again!
Monday, March 30, 2020
Garden imperfection is heaven to me
I don't garden to produce high yields or impress the neighbors. I don't believe gardening is about knowing all the rules or even following all the conventional ones I do know. And ya, I know a little. Been doing this a while. But I don't think that makes me any better than the average beginner. There's a free spirit to this hobby that I embrace fully.Without imperfection, gardening looses it's appeal for me.
Funny story:
The other day, I saw a Craigslist ad
for free dirt that contained a multi-paragraph dissertation about the
difference between dirt and soil, It listed the credentials and
affiliations of the person offering it and how you should use the
free dirt in precise detail. So, the free dirt wasn't exactly free.
It came with a lecture that assumed the recipient was an absolute
idiot. No thank-you. You can keep your free dirt and your unsolicited
advice as well. PS - You're not that special and kind of snotty as
well. LOL
I like my garden full of mistakes.
I like nature to show me the way. Screw
ups are not just learning experiences or a chance to “do better”
next time. They reveal something far superior in my opinion. They
show us how nature does things. They show us the natural flow that we
should be following.
I don't manipulate my garden.
I get lost in the beautiful
imperfection of doing things the natural way. There are no nasty
chemicals allowed in my yard and garden. I don't believe in
artificially created landscapes. Nature is so much more beautiful and sustainable. I feed the birds, bees and bunnies as well as all the
little microorganisms that are vital to our survival.
My garden is not about stress.
It's about peace and tranquility.
Sweating the details takes away from the reason I garden. My garden
is my happy place. Forcing things, conforming to or dwelling on the
rules makes gardening feel like work. And of course, there are things
that have to be done in the garden. Still, there's no need for
obsessing over whether everything is by the book.
I love gardening
I want to keep loving it. That's why I
love the imperfection of it all. Rigidity in gardening compromises
nature. And isn't getting closer to nature what gardening is about?
Monday, March 16, 2020
Busy work for gardeners in isolation
As gardeners, we're somewhat lucky
during the Coronavirus crisis or any epidemic. We won't be bored. Our
hobby doesn't require a whole lot of socialization. We're in a unique
position to create our own groceries, should this outbreak last
longer than expected. Get up off the couch, gardeners. Isolation
doesn't mean you have to abandon your favorite hobby!
Make a list. Include everything you
wish to plant this year. Some of you may have done this already. Good
for you! If not, here's a few tips:
Focus on what you know your family will
actually eat.
Include one or two experimental or new
to you items just to keep things exciting.
Address possible food shortages.
Include long life veggies such as squashes, potatoes and onions.
Don't forget fruit and legumes.
Plant only what you have time, space
and energy to care for.
Tailor your list to gardening zone
conditions.
Check your seed stock. Do you have
everything on the list? If not, order seeds, roots, bulbs and plants
online to avoid crowds.
Map out garden areas on paper. Don't
forget to plan space for herbs, greenery and florals.
If the weather is warm, prepare your
soil for planting. Isn't it great to get out of the house and stay
active and worry free?
Note: If you need compost, soil or
other amendments, consider delivery as a minimal human contact
solution.
Go chemical free. Take it easy on your
lungs and general health for adequate resistance.
It's true that some of these gardening
activities can be tackled while you're ill. However, If you do become
sick, don't take on more than you should. Take care of yourself as
the first priority. Gardening can wait. Above all, look on the bright
side. Being isolated gives you plenty of extra time for spring
clean-up, organization and planning. By planting time, you'll be
ready to rock it!
Friday, March 13, 2020
Our ten dollar raised beds. Wait, what?
Yes, you heard me right. Our raised
beds cost us just ten dollars each. Complete! Well, ok, we had to
paint them, but that cost was minimal. So, where did we get these
awesome garden beds for ten bucks? The salvage yard, of course.
It all started when I was browsing
Craigslist for materials. You know, sometimes you can find
salvageable wood, etc. Anyway, on a whim, I type garden beds into the
search bar. Hey, you never know until you try,
So, up pops this ad for hinged pallet
holders. The ad suggests using them as raised garden beds. Pallet holders keep pallets steady when they're shipped.
Basically, the pallet holder consists of four 8 inch wide boards,
hinged together into a rectangle.
These pallet holders are perfect as
garden beds. They measure around 2x3. They don't involve any nailing
or screwing. You just unfold them, fill them with soil and you're
good to go. Amazing find! And since they're slightly smaller than
conventional garden beds, I can reach all sides.
They even stack!
As you can see from the drawing, we
chose to paint ours white to match our house, since they were being
placed in the front yard. But other than that and filling them, they
were virtually no work at all.
Note: In the picture, they're not filled yet.
I have to stop here to give props to my
daughter and grand-kids for helping me paint and also, to Gary for
shoveling all that dirt from truck to beds. 4 truck loads worth!
Don't you love the cool pattern I laid
them out in? We wanted some low and some high beds. And there's
plenty of access space in between them. We haven't decided whether
we'll use wood chips or gravel around them or just leave the grass
and keep it trimmed.
Now all we need is for spring to
arrive. Gary will be sowing seed in the back yard no-dig area while I
work on Herb's garden and the raised beds. It's going to be a great
gardening year!
Our no-dig adventure
![]() |
| Is digging a thing of the past? |
If you haven't heard about no-dig
gardening or you have and you have your doubts, read on. Gary and I
have been watching a lot of Charles Dowding videos on that very
subject. A lot. So last year, we didn't just plant in containers. We
also planted an experimental no-dig plot to see if it would work well
for us. Well, mainly, for me with all my mobility issues.
It all started when we moved the tarp
we had under our above ground pool. Since the weeds under there had
taken a hike, we decided this would be a great opportunity to do a
no-dig garden experiment. So, off we went into town for a load of
planter's mix.
My sister and I hoed up the residual
weed sprouts from the area. Gary shoveled and barrelled the planters
mix onto the weedless spot. Not an easy task, by the way. Thanks,
hon. There we planted some seeds, interspersed with greenhouse
seedling for zucchini, yellow squash, pumpkins, watermelon and
eggplant.
There was a late cold snap, so we had
to replace a couple plants, but holy cow did no-dig ever work. There
were very few weeds, so bending wasn't an issue. And the no-dig did
so much better than the stuff we planted in containers!
We're calling the eggplant and
watermelon a loss. They didn't coming along quickly enough due to the
cold spring, but.... Oh my gosh, the squash! It just keeps coming and
coming and coming. And the plants are extraordinarily full, healthy
and green as well. No bugs. No disease. No deficiencies to deal with.
I could go on, but you get the drift.
By contrast, our container plantings
last year were a huge disappointment. The peas totally shriveled up.
Replaced the tomatoes twice, even though we waited for warm weather
to plant them. And now, tomato batch 3, while producing a lot of
large, green orbs, look severely undernourished, despite our best
attempts. In short, nothing but the herbs did well in containers,
which is how I grow them every year.
Even the radishes were a big fail in
container-land. That never happens!
I don't think the prairie is a good
environment for container veggies, you guys. Too hot and windy is my
guess. That dry wind just sucks the life out of container soil.
Watering is an endless battle. The herbs don't mind. They're very
resilient. But the veggie roots have nowhere to go once the pot dries
up, so to speak.
On the other hand, the no-dig veggies
can root deep for water, thus guaranteeing their survival two ways.
First, they get the water. Second, their deep roots help them
withstand the crazy winds out here on the Colorado plains.
So now we have a huge tarp laid out to
banish weeds in next year's no-dig garden spot. We built some raised
beds out front too. We'll be keeping our container herbs for “Herb's
garden” which should be in full swing by next year, but all the
veggies that spread or need a large area will be planted
no-dig-a-rama style. Our dream is to have our whole yard planted some
day.
One patch at a time in the gradual
garden, as always. Just on a bigger scale and with delivered dirt to
save Gary's back. I mean, he's a nice guy, but even nice guys have
their limits.
Thursday, March 12, 2020
Herb's garden
How cool is it that my Dad was named
Herb and loved to garden? Kismet! I've always wanted to plant an herb
garden with every herb I could get my grubby gardener hands on and
name it after my Dad, Herb. Herb's garden! Awesome, right? Ya, I'm a little corny.
I've been planning this a long, long
time. I knew our first house in the city was not our forever home so
I couldn't do it there. Herb's garden, after all, is the kind of
thing that cries out for permanence, home base for life, that kind of
thing. And Herb, not unlike his daughter (me) would never live in the
city permanently.
So... when we bought our forever, small
town country home, well, I can't say it was the first thing I did,
because the first thing I did was get married to the love of my life
under our very own tree in our very own forever backyard. Hey, I
warned you that I'm corny. Anyway... the next thing I did was start
planning Herb's garden. For next year.
And now it's next year and guess what?
Still no Herb's garden. It's time for the gradual garden to make some
progress. Because, in hundred degree weather, last summer, I tore
apart my old fenced garden, taking the first steps toward my dream.
You guys, I spent a whole day hauling
heavy tub containers out of there on a dolly, setting up an official
potting shed, etc. But don't worry about me. It felt good. Really,
really good. Exhausting for sure. But good. No. Great!
The vision is spectacularly quaint, you
guys. Baskets, pots and such, overflowing with herbs and flowers
everywhere. Some of them hanging among mason jars from the fence or
suspended from the pergola-type roof we plan to add. And maybe a
little bistro like table and chairs or even something more comfy for
iced tea, lemonade or margarita breaks.
And now I'm sitting out
here on our humble little warped deck (a project for another time)
staring at the spot where Herb's garden might possibly come to life
in full bloom this year and feeling like the million bucks I have
never had. I'm absolutely giddy, you guys.
And here's the thing, I know that when
your fantasies come to life, the result may not reflect your vision
exactly. But hey, whatever Herb's garden morphs into, it will still
be awesome. Watching your dreams transition into reality is not about
perfection. It's about the beautiful, imperfect reality your vision
becomes.
Dad would be proud.
Tuesday, October 30, 2018
Front yard gardening thoughts
Not so much by luck but by choice, both the homes we've owned allowed front yard gardens. However, our first home in the city was stricter about what was planted than our current home in a small town on the Colorado plains. Which is one of the reasons we chose to leave the city. Because even though our first house permitted some front plantings, they were very specific as to the ratio of plantings to grass. Here, there are no such restrictions. And you know me. I must be free to garden as I please!
For some reason, many municipalities or neighborhoods believe front yards should be covered with a neatly manicured lawn and little else in order to keep a tidy, uniform look. So much so, that front yard plantings are often strictly regulated. In some people's opinion, this adds to property values. Personally, I love homes with vegetable, herb and flower gardens in front. They're gorgeous and productive. I don't see what the big deal is.
In my opinion, front yard gardens are beautiful for multiple reasons. They provide food, for one. In fact, some front yard gardeners share their food with the community. They're less costly to maintain. They're a wonderful way to bring back healthy ecosystems, destroyed by years of maintaining an unnatural grass lawn. They also reflect the personality of the homeowner. I don't know about you, but I'm not into “Stepford” towns. I love diversity and variety.
I'm really looking forward to doing some front yard gardening next year. The old homeowners did us a great favor by planting a lot of perennials flowers in the front beds directly in front of the house. I plan to supplement with a few more. I got a good start on it last year but since we moved late in the season, I didn't have a lot of time to properly trim, mulch and such. I hope to be able to add some finesse next spring.
I'd like to ad some beds around the outer border of the front yard for a cleaner, more defined look. I've also been reading up on minimizing the grass by planting clover instead. I've heard it requires less work, keeps weeds down and uses much less water, while still maintaining a grassy lawn look. My eventual goal is to have mostly garden with just enough clover lawn for paths through. But that's likely to take time.
I want my front yard garden to have a healthy combination of herbs, flowrs, veggies, shrubs and trees. I'd also like a few wild native plants in the mix. Ideally, I'm looking to recreate the natural local ecosystem but add a few non-conflicting food plants to the mix. As always, my garden will be organically planted and maintained. No GMO's allowed. And of course, in consideration, it will be a bit neater than the back garden.
And speaking of the back garden, I had some containers back there this year. But next year, my focus is going to shift to the front. I want to spend my summer largely on “perfecting” the front yard. Even though I don't believe a perfect green lawn is healthy, I still believe in curb appeal. The front yard is all most people see of your home. So why not make it beautiful?
The plans I have for my front garden might not work for yours if you live in the city or in a neighborhood with strict regulations. Please don't let that stop you from doing whatever gardening you can. Planting diversity is good for the planet. You may be able to plant as you like in the back yard, depending on where you live. If not there's always porch or balcony container gardening. It's not quite the same as a full on front and back yard garden. But hey, it's definitely less work!
Friday, June 15, 2018
Weirdly gross garden story? IDK
So, as many of you know, we recently
moved to a new to us fixer upper in the country. It's been an
adventure so far. The best kind. Except for this one thing. Well, OK,
there have been a lot of weird things. But this is the worst by far,
so far. It seems the old homeowners like to bury potted plants in
garden beds. But that's not all. It seems they enjoyed leaving them
there for years upon years until the pots filled with roots which
basically turned to cement. And BTW – there's more to the story.
You'll see.
So... My grand-daughter's very helpful
boyfriend was kind enough to remove 4 of these pots from their
respective holes and the dirt from the pots. Seriously, these things
must have weighed 50 pounds each. I could not budge them. Oh, but
we're not done yet. Nope. Because now I had to figure out what the
heck to do with the dirt. Thus, I had the brilliant idea to soak the
rock hard pieces and break them apart.
You guys, I don't know how many gallons
of water I used but it took 4 days of soaking these things for hours
with the sprinkler to get three of them to break apart. There's still
one left. I am done for the day now, though. I'll worry about that
later. But that's not all. Nope. Not at all.
Now, before I go on, let me explain
that in the holes left by the pots, I decided to plant a lilac, some
rhubarb and some walking onions that I brought from the old house.
And also that, once I broke up the dirt, I figured that since it was
mostly roots, it might have some nutritional value for my new plants.
So, I proceeded to shovel said dirt around the stuff I was planting,
in addition, of course to some good soil I bought, so as to take no
chances.
Here's the fun part, though. And I
should perhaps mention that the old homeowners were hunters. As I'm
shoveling the soil back into the hole, my shovel strikes something
harder than the cement soil. I look down and at my feet is the
jawbone and teeth of I don't know what animal the homeowners killed.
They had dogs, you guys. Did they give their dogs this to chew on?
Wait. Did it come from one of their dogs? Was this a burial ground?
Ugh! And BTW, even the irony of the dogs chewing on a jawbone from
another animal grossed me out. Ugh again!
So guys, if you garden, here's a tip
for you. Do not bury pots full of plants and leave them for decades.
And if you do, please do not bury them with parts from the animals
you have slaughtered. Because the new homeowner may be an herbivore
with a chronic illness who has better things to do than deal with
your 50 pound cement blocks and your nasty hunting leftovers.
Funny/Not funny
And I refuse to take pictures. Yuck!
Thursday, December 28, 2017
The Compost Diet
![]() |
| Yum! Yum! |
Ha ha ha! I just realized that my
compost eats better than I do. I mean, check it out, you guys. My
compost pile only eats fruits, vegetables and whole grains. It
prefers organic matter. It completely rejects animal products. OK, it
might accept eggshells if I ate eggs. But since it's my compost and I
don't eat eggs, we'll probably never know.
Unlike me, my compost doesn't struggle
with cheese cravings. It doesn't eat junk food or crave salt and
sugar. Yup. My compost not only eats better than I do, it has a
stronger willpower. Or maybe my compost, being a natural process,
just flows with nature better than I do.
I find it hilarious that my compost is
vegan by nature. Especially since I'm going vegan myself. I also find
it funny that while I am only 95% vegan to date, my compost, being
smarter than I am, has always been 100% vegan.
Now, I don't know what this all means
or if it means anything at all. I just find it amusing as all get
out. Sometimes there's no lesson and just a good laugh. On the other
hand, maybe my compost is taunting me or trying to tell me something.
Maybe I should try harder to be 100% on the same diet as my compost.
Ha! Too funny! Thanks for the morning
chuckle, compost heap!
Wednesday, December 6, 2017
Bringing the rural life home
![]() |
| Just a little country in the city |
Gary and I have been wishing to move to
a more rural setting for a long, long time. Actually, when we bought
this house, almost 8 years ago, it was a bit of a compromise in that
respect. Our house is in a peaceful neighborhood but we really wanted
open spaces and fresh air. Unfortunately, due to the conditions of
our financing, country living was simply not an option.
So, ever since then, we've been living
with a view toward moving out. Which truly is no way to live at all.
A house should be a home, not a temporary holding spot.
However, times have changed. Our
neighborhood has light rail now. So, our simple, uber-cheap,
fixer-upper house in the suburbs has gone up in value. Which has
prompted us to seriously consider selling and using the equity/profit
as a down payment on that rural dream.
Fast forward to a couple days ago, when
something happened that made us think perhaps we'll just stay where
we are.
Gary accidentally left his cell phone
in the family car and drove off to work in the plumbing van on Monday
morning. Meanwhile, I took said car to our favorite grocery store,
halfway across town. It took Gary just a minute to realize his
mistake. It took about an hour for us to connect so he could get his
phone and get to the customer who was anxiously awaiting his arrival.
That really got me thinking. What would
we have done if we were living out on the plains or up in the
foothills? It would have taken Gary two or three hours instead of
just one to reconnect with his wayward phone. Which, incidentally, he
cannot do his job without. He might have lost that customer. He might
not have his job. Which, let's face it, he is lucky to have,
considering what others go through.
Clearly, this is an issue that we never
considered in our excitement to finally be able to move to a more
rural setting. The commute from the small town we'd like to move to
is only marginally do-able. If anything like this should happen
again, it would be a major inconvenience. Gary would be risking
ruining his reputation for being reliable and prompt. He could
jeopardize his relationship with his company and/or his clients.
Kind of a depressing setback for us. I
mean, we were really looking forward to making this country dream
thing happen. We were so excited. But this phone incident made us
realize that even if Gary never forgets his phone again, there are
many other things that could happen along this line.
But wait, don't despair. We have found
a solution, because...
Serendipity being what it is, the day
after the lost phone incident, a yearly event occurred. We received
the first of many seed catalogs in the mail. Immediately, a symbolic,
yet gleaming light-bulb lit up over my head.
Hey, I may not be able to move to the
country, but we can bring the rural life home. You see, while we do
live in the burbs, we have a pretty substantial back yard that could
easily be turned into a huge urban garden. I mean, we already have a
small garden plot out there, but why not go all out and turn the
entire back yard into a little mini back 40?
It just might work.
In addition, in our front yard, we
could expand on the number of herbs and flowers we already have and
deck it out with some rural flavor. Why not?
Who knows? We might even forget that
we're in the city, at least for a few precious moments, here and
there. Not only that, but with a little paint and some savvy décor,
our home's interior could also be countrified.
And, since we have settled on staying.
We'll have taken ourselves out of that, “This is just a temporary
dwelling” mode of thought, thus making our house feel even more
like a home.
Hey, if we can't move to the country,
we can bring the country to us, right? You guys, I'm really excited
about this. And guess what else? Creating your own dream is way
better than purchasing someone else's anyway. And now, I'm off to
plan our new country life in the city. And all because Gary left his
cell phone in the car by mistake one day.
I guess one never knows where
inspirational solutions will come from!
Thursday, December 8, 2016
What to get an organic gardener for Christmas
Are you browsing through gifts for your friendly, neighborhood
organic gardener? Why not? Don't you love me? I shared all that
zucchini with you last year, remember? OK. You caught me. This is
actually my wish list. Hey, if I don't get it out there, how will
anyone know? So, from pricey to dollar store, common to unusual,
here's what this organic gardener would like for Christmas this year.
Chances are, your favorite organic gardeners may have the same sugar
plums dancing in their heads.
A rototiller would be awesome, thank you!
Every year, we rent a rototiller to break up the soil. Every other year, we do it late because someone forgets how early crops need to planted. I don't know how he forgets. I nag him enough. So this year for Christmas, if you really love me, please put a pretty red bow around the biggest, toughest rototiller you can find. I will repay you in produce, since my garden is likely to be more prolific if I actually get it started on time.
A garden gadget or two is always welcome.
But please do not get me anything “As seen on TV.” Do not get me that rotating spiked weeder on a stick. I already have one. It sucks. Likewise that wrinkled up cloth hose thing. Bought it Used it once. It sprung about 25 leaks. Just goes to show you, don't believe everything you see in a demo video.
Please get me anything that makes gardening easier.
I'm not getting any younger. I need all the help I can get. You don't even have to buy anything. Will you work the garden for food? I promise I won't make you hold up a cardboard sign. If you're feeling lazy, though, just head for any home improvement store. An organic gardener can never have too many hoes, shovels or bottles of earth friendly pesticide. Smaller budget? The dollar store sells hand gardening tools.
How about a load of compost?
Every year, I get free compost from the hospital where my daughter works. I also make my own. For some reason, it's never enough. My veggies are hungry! So, if you have a truck, don't offer to move me. Just head on over to your local landscaping materials center and fill that baby up with the good stuff. Heck, you can dump it right smack on my front lawn for all I care. It needs some love anyway.
Every organic gardener loves GMO free seeds.
The problem is, not everyone knows where to get them. Confused about what seeds your favorite gardener might like? Just buy an assortment. Got an organic gardening fanatic who's trying to survive the apocalypse? Check out the seed bank assortments. These seeds last for seven years! Hey, who knows? There have to be some survivors . I'm pretty sure if I'm one of them, I'll still be here, working my garden, like always.
A rototiller would be awesome, thank you!
Every year, we rent a rototiller to break up the soil. Every other year, we do it late because someone forgets how early crops need to planted. I don't know how he forgets. I nag him enough. So this year for Christmas, if you really love me, please put a pretty red bow around the biggest, toughest rototiller you can find. I will repay you in produce, since my garden is likely to be more prolific if I actually get it started on time.
A garden gadget or two is always welcome.
But please do not get me anything “As seen on TV.” Do not get me that rotating spiked weeder on a stick. I already have one. It sucks. Likewise that wrinkled up cloth hose thing. Bought it Used it once. It sprung about 25 leaks. Just goes to show you, don't believe everything you see in a demo video.
Please get me anything that makes gardening easier.
I'm not getting any younger. I need all the help I can get. You don't even have to buy anything. Will you work the garden for food? I promise I won't make you hold up a cardboard sign. If you're feeling lazy, though, just head for any home improvement store. An organic gardener can never have too many hoes, shovels or bottles of earth friendly pesticide. Smaller budget? The dollar store sells hand gardening tools.
How about a load of compost?
Every year, I get free compost from the hospital where my daughter works. I also make my own. For some reason, it's never enough. My veggies are hungry! So, if you have a truck, don't offer to move me. Just head on over to your local landscaping materials center and fill that baby up with the good stuff. Heck, you can dump it right smack on my front lawn for all I care. It needs some love anyway.
Every organic gardener loves GMO free seeds.
The problem is, not everyone knows where to get them. Confused about what seeds your favorite gardener might like? Just buy an assortment. Got an organic gardening fanatic who's trying to survive the apocalypse? Check out the seed bank assortments. These seeds last for seven years! Hey, who knows? There have to be some survivors . I'm pretty sure if I'm one of them, I'll still be here, working my garden, like always.
How to use a live potted tree for a greener Christmas
Environmental concerns may have you
thinking about using a live Christmas tree for the holidays.
Artificial trees often end up in land fills. Real cut trees are often
used once and discarded. You can donate them to your city mulching
and recycling program but somehow it never gets done. Why not try
using a live, potted Christmas tree this year? Not sure how to do it?
These tips can help you keep your live Christmas tree in the best
condition before, during and after the holidays.
Keep it outside for a few days, or
not.
When you first purchase your live Christmas tree from a nursery
where it has been kept outside, give it some time to adjust. Moving
the tree may cause it some shock. Keep it outside for a few days
until it gets used to being taken from home.
If your tree was purchased from an indoor nursery, bring it in the house right away.
Keep in natural light.
Once your live Christmas tree is ready to bring into the house, keep it in natural light. Live Christmas trees do best in front of a large window. This gives them the sun they need on a daily basis. Keep the soil moist, not wet. Extremes of any kind may cause your live Christmas tree to go into shock and die.
Avoid heat and air ducts.
Fluctuating temperatures are no good for your live Christmas tree. Take care to place it away from heat and air ducts. Even though evergreen trees are used to the cold, they don't appreciate going from hot to cold and back again. They're used to the more gradual temperature changes of mother nature.
Wait to decorate and be gentle.
Once you bring your live Christmas tree indoors, give it a breather. Let it adjust to the new environment in your home before loading it with ornaments. When you do decorate, go a little lighter than you normally would. Skip the lights or just use a few. Decorate gently and without heavy ornaments.
Harden off before re-planting.
Just like any other plant, a live Christmas tree should be hardened off before bringing it outdoors in the pot. To harden off your tree, bring it out of doors for a few hours each day. Do this for four or five days before leaving it outdoors permanently. It's best to leave it outdoors in the pot for the winter. However, do make sure the pot is sheltered from the elements. Plant in spring to green up your yard.
Working the Denver garden in winter and early spring
For some Denver gardeners, winter is a
welcome reprieve from gardening. Others wish they could garden all
year. If you're in the latter group, you'll be glad to know that in
Denver, at least, you don't have to stop gardening when the snow
falls. Here's how you can garden throughout the winter in Denver.
November
The first day of winter is usually
somewhere around the 21st of December. That doesn't mean
it won't be nippy in Denver before then. Officially winter or not,
November is usually considered a winter month. In Denver, however,
it's still very possible to keep cold hardy vegetables like greens
and root vegetables growing right up until the first of December. If
you have a cold frame or greenhouse, you may be able to grow them all
winter. It all depends on how cold it gets.
In November, you can likely still
finish your garden
clean-up tasks. You may even still have some produce to harvest.
Yes, there will be cold days. There will also be warm ones. Take
advantage of them when they come to finish the last of your big
garden tasks, set up those cold frames, pick off the last of the
harvest and more. December is not quite as Denver garden user
friendly.
December
Denver Decembers can be bitterly cold.
They can also be seasonally warm. That's due, of course to the
semi-arid climate. While it may be possible for procrastinating
Denver gardeners to continue their garden clean-up into the weeks
prior to Christmas, there are no guarantees. A better bet would be to
use this time to wrap up those garden themed Christmas gifts. Your
homemade salsa, sauces, jellies, jams and even your excess squash and
pumpkins make a wonderful gift for those without a garden.
You can also start herbs indoors for
next year's garden and continue tending any hardy veggies you may
still have growing.
January
It's January already? In Denver,
January is typically frigid. Time for gardeners to stay primarily
indoors. Order and/or peruse those seed catalogs. Checking your seed
inventory first insures that you won't over-order. Believe it or not,
January is also a great time for planting onion seeds. Starting early
gives them time to develop into mature bulbs for planting.
Re-pot any herbs that have outgrown
their starter pots.
February
February is all about paper plans. Make
a scale sketch of your garden spaces. Take a look at the seeds you
have in stock. Consider the plants you plan to buy or grow. Pencil
everything in so you can make necessary changes easily. Take size and
height into consideration. In Denver, the general rule is to plant
your rows running from north to south. Taller crops should be planted
in the westernmost rows, shorter ones in the east, toward the rising
sun. This way, as the sun makes it's way across the sky, no plant is
shaded by another.
Don't forget to check that your
neighboring veggies are compatible.
It might surprise some newer Denver
gardeners to know that February is also a great time to start
tomatoes and peppers indoors or in a heated greenhouse. Once again,
that early start insures that plants will be a healthy size and in
good condition for planting when the time comes. They will have to be
re-potted, trimmed and fed as they grow.
March
Use March to start the rest of your
veggies indoors in Denver. There are also some crops like peas,
squash and corn that can be started from seed outdoors in late March.
If you're not sure which ones, check the Farmer's Almanac.
April/May
Winter is pretty much over by the end
of April in Denver. You should have your garden space tilled and
ready and a few hardy seed crops planted by May 1st. Some
can be planted sooner. You may still see snow or frost in April, but
the garden soil should be workable, for the most part.
By the first of May, you should have
most seeds planted. Tomatoes and peppers will have to wait until
mid-May or the first of June, weather dependent. Don't do any heavy
planting without checking weather reports. And remember, Denver is on
the edge of the tornado belt. Be ready to quickly protect plants from
those spring storms that begin in June.
Last minute Christmas gift ideas from the garden
Got extra house guests coming for the
holidays? No time to shop? Depleted your Christmas money several
weeks ago? Why not look to your garden harvest for ideas? Sure,
gardening season ended long ago. That's alright. You can still make
use of your harvest with some of these last minute Christmas gift
ideas from the garden.
Spice things up.
Surely you have some strings of peppers
hanging in your root cellar. You can dress them up with a bow for a
quick last minute gift. Better yet, rehydrate them. Make some pepper
jelly or red hot sauce for your unexpected guests. This garden gift
is even Christmas color themed!
What else is hanging around?
If you're like most gardeners, you have
an abundance of dried herbs. Why not share them as Christmas gifts?
Wrap them in cheesecloth and tie for handmade herbal tea bags. Seep
them in vinegar for a tasty condiment. Make herbal extracts by
soaking them in Vodka. Or, simply fill a set of pretty spice jars.
Take stock of your canned goods.
They're not in fancy jars because you
made them for personal use. That's OK. A little fluff can fix that
issue. Pair assorted garden canned goods in a pretty little fabric
lined basket. Top it off with an herbal sprig for a festive homemade
Christmas gift. It's a natural!
How about that surplus squash?
You have scads of it stored in the
basement. From zucchini to pumpkins, there's way more than you can
eat. Why not put together a colorful mix of assorted squash and other
root veggies? Pack it in a grapevine cornucopia for added flare.
Last minute gifts from the garden
aren't meant to be fancy.
They're meant to be useful and
delicious. So, don't sweat over the details. Just assess your
inventory and put your imagination to work. Somewhere in your house
is the perfect garden gift for those unexpected Christmas guests.
Grow your own herbal soap scents in the garden
Do you have any idea how easy it is
to grow your own herbal soap scents in the garden? Well, let me tell
you. It's so simple, you'll wonder why you've never done it before.
It's much easier than making the soap itself. If you're a soap-maker,
for fun or profit, making herbal scents is one of those things you
must try. Anyone can do it. It's not hard to make your own
extracts.Then, just add them to your soap batch for a lovely natural
scent.
Perennial herbs are quite easy to grow.
Just one tiny herb plant can grow into a big patch in a single season. They tolerate a lot of different climates. They're not fussy about soil as long as there's good drainage. They do prefer sun to shade in most cases. Still, it's best to check the label when planting herbs you're unfamiliar with in the garden. Trim them back at the end of the season. Next year, they'll pop right back to life.
Scent combinations:
Perennial herbs like thyme, rosemary and sage give homemade soap an old fashioned twist. Combine them with florals to make your own unique soap scent combinations. Rosemary lavender is a classic.
Basil and cilantro are popular soap scent choices.
These herbs grow best indoors, but can be grown outdoors in partial shade. They like a lot of water. Still, you'll want to make sure they drain well. You will have to plant them yearly, if grown outdoors. Indoors, with proper care, the same plant can last several seasons.
Insider tip:
I have my basil growing under my outdoor faucet. That way, my leaky hose connection does the watering for me every time I turn the water on.
Scent combinations:
Basil and cilantro mix well with citrus scents for soap-making. Try cilantro lime, lemon basil and more.
How about growing some minty garden soap scents?
Growing mint requires little or no work. The challenge is getting it to stop growing. Mint likes sun and good drainage. Other than that, you just plant it and watch it prosper.
Insider tip:
Like most seasoned gardeners, I grow my mint in pots. Doing otherwise might jeopardize other herbs. Mint likes to take over and does so rapidly.
Scent combinations:
Mint goes well with food scents like vanilla, almond or fruit.
Note:
Aloe Vera is no herb, but you can save a lot of money by growing your own to add to homemade soap.
How to make herbal extracts:
*Fill a pint jar with your choice of washed, crushed herb.
*Fill the jar with clear vodka and cover.
*Place the jar in the sun.
*Let it "brew" for a couple weeks.
*Strain.
*The liquid is your extract.
Yes, it's that simple to make herbal soap scents from your garden.
Wrong season? That's OK. Herbs grow well in your kitchen window too. There's just no stopping them. Why not plant some herbs for soap-making today? Even if you don't sell your soaps, your friends and family will love them as gifts or for everyday use.
Great Christmas gifts from the garden - Herbal vinegar
![]() |
| Use herbs from your garden to make infused vinegar for holiday gift giving |
Give the gift of herbal vinegar for
Christmas. Herbal vinegar is one of the easiest things you can make
from your Denver garden. Herbs grow like weeds here in the hot dry
summers. Who wouldn't love this gift that makes salad dressing a
breeze? You can flavor your herbal vinegar with whatever you
wish.
To make herbal vinegar gardening gifts you will need clean mason jars or other jars with lids. You will also need enough white or apple cider vinegar to fill the jars. The amount and type of herbs used will reflect your taste and the kind of herbal vinegar you would like to make.
Basic instructions for herbal vinegar
*Pack ½ cup rubbed herbs into each pint mason jar.
*Heat vinegar until it comes to a boil.
*Pour 12 oz. vinegar into each jar with the herbs.
*Allow the vinegar to cool.
*Cover jars and steep for several weeks in the refrigerator.
To make herbal vinegar gardening gifts you will need clean mason jars or other jars with lids. You will also need enough white or apple cider vinegar to fill the jars. The amount and type of herbs used will reflect your taste and the kind of herbal vinegar you would like to make.
Basic instructions for herbal vinegar
*Pack ½ cup rubbed herbs into each pint mason jar.
*Heat vinegar until it comes to a boil.
*Pour 12 oz. vinegar into each jar with the herbs.
*Allow the vinegar to cool.
*Cover jars and steep for several weeks in the refrigerator.
*Transfer to pretty vinegar dispenser
bottles for giving.
Got houseplants but few windows?
Gardening indoors in a home with
little natural light can be frustrating. That's especially true in
winter when you can't put plants outside. Not everyone can afford or
make room for grow lights. How can you make the best use of the light
you do have? Is there a way to make sure all your plants get some
light without knocking a wall down? Could you use plants that love
the sun a little less? Here's some ideas that might help your indoor
winter garden along when you have very few windows.
Make better use of glass patio doors.
So, you don't have a lot of windows. Do you have glass patio doors? If you do, I'm sure you have a few plants in front of them. Have you thought of using only one side to enter or exit in the winter? Chances are, you don't use the yard that much off season anyway. If you can manage it, you'll have a lot more space for your sun loving plants. Remember to use all the space by hanging some and putting the rest below.
Shelves allow for more plants.
A shelf in front of your patio door increases plant display capacity in cold months. Use shelves in windows for smaller plants. You don't need special windows to accommodate shelves. Simply nail supports to the inside of window frames. Your shelves needn't be fancy either. Cut 2x4 planks to fit the windowsill. Rest them on the side supports.
Widen your windowsills.
Maybe your windowsill isn't big enough to accommodate your winter houseplants. That's alright. Expand the space by using a wide board, screwed to the sill. You can finish the board any way you like. Check your local home improvement store for finished shelving if you're not handy with a paintbrush. Glued on decorative edging gives a more finished look.
Shifting plants insures sunlight for all.
Some homes and apartments are truly dark. Basement apartments are one example. If your home has just one or two awkwardly placed windows, you can still have a few winter houseplants. Simply rotate them so each one gets some light every few days. As long as you stick to plants that don't require extreme sun, they should be fine.
Some plants prefer indirect light.
Not all plants need to be placed in windows. Some prefer a less intense light. So, when placing your winter plants, group them according to sun needs. Start with those that need the most sun. Be sure they are closest to the light. Work your way outward with the rest of your plants. It's an easy way to insure your plants are happy in winter, even when you have very few windows.
Garden planning – Denver winter yard and garden clean up
![]() |
| Sometimes Denver winters are delayed. This picture was taken in late November. |
Hey there, Denver gardeners. Are you
planning for your spring garden? There's one thing you may have
forgotten. Is your yard and garden clean and ready for planting? If
not, this is a great time to tackle it. Here in the Mile High City we
have a lot of intermittent warm winter days. Why not use them to
ready your garden for spring? After all, you can only pencil so many
plans before you start yearning for the outdoors. So, what exactly
can you do midwinter in the garden?
You can pick up the trash.
Winter winds sweeping trash into your
yard? Fallen twigs and branches everywhere? Doggy-poo getting the
better of you? Kids toys all over the yard? If you picked all these
things up now, it won't be such a chore in the spring. Wait for a day
when there's no snow on the ground and get it done.
While you're at it:
*Check for and discard broken garden
pots.
*Make a note of landscaping issues,
such as peeling paint on fences and borders.
*Check your garden decor for damage
too. (Wind chimes, gazing balls, etc.)
Are you really going to use that
thing?
Remember all those fabulous free finds
you found on last year's scrounging expeditions? Make plans to use
them now or discard them. You know if you wait until spring, you'll
be too busy to construct those beds from that scrap lumber or make
that awesome planting tower from those pallets. Why not do it now,
while you have time? (On those warm days, of course.)
Organize tools in the garage or
shed.
If you're like most gardeners, it takes
days to find your tools in the spring. Why not plan ahead for that
eventuality? Now's a great time to weed out the tool shed or garage.
Crank up the tunes. Open the doors for a breath of fresh air. On days
when Denver winter temps hit the 50's you might even think it's
springtime. Plus, cleaning clears the cobwebs out of your head.
Stake out the tilling zones.
Do you have areas that will need
tilling, come spring? Why not stake them out to make it easier? Just
pace off the areas you wish to till. Pound a stake in at each corner.
Now, come spring, it's just a matter of renting a rototiller and
getting it done.
Take a last look around the garden.
Are there any clean-up chores you
missed last fall that need doing? If so, make a note of them or just
do it. Don't have time to do it all today? Frigid out? Ground too
hard? That's OK. Denver has plenty of warm days in winter. You can
catch it next time.
Denver winter gardening: Maintaining compost piles
Compost is a must for organic Denver
gardeners. Even if you use Hugelkultur
piles, you'll also need compost to amend soil in other beds. Denver
winters can be harsh, however, they are generally milder than in the
rest of Colorado. That makes it easier to maintain compost piles.
That being said, it does still snow and get well below freezing in
the metro area, for at least a couple months in winter. So, how do
you tend compost in mile high snow and freezing temperatures?
Sometimes tending compost is just
impossible.
You're not going to be able to tend
your compost piles in 2-3 foot snow drifts. That's OK. The snow will
provide needed moisture for the pile. You won't always be able to
effectively till frozen compost either. That's OK too. Provided, that
is, that you have been diligently tilling up to that point and
continue to do so whenever possible.
Denver warm spells
Denver warm spells are of great benefit
when it comes to maintaining compost piles in winter. Be sure to take
advantage of them. Whenever the pile is warm enough to till, be sure
to get out there and get it done. If it seems dry, add water. This is
important because in drought years, compost piles will not get enough
snow to keep them cooking.
How about that Denver sun?
Use it well in winter. Placing a cold
frame over compost piles in Denver can effectively keep compost hot
nearly all winter. That means composted soil will be ready to use
much sooner. This doesn't always work in colder climates, further
from the sun, like in the eastern U.S. However, for Denver, with
those 300+ days of sunshine and mile high altitude, it's a perfect
solution.
Note: If you don't have a cold
frame or glass, use clear plastic to warm compost with the sun.
Don't forget to make additions.
Throughout the winter months, be sure
to add kitchen vegetable waste, coffee grounds, etc. to your compost
pile, just as diligently as you would in warmer months. Keep a bucket
in the kitchen to collect scraps on snow days. These can be brought
out weekly, on good weather days. Denver snow doesn't generally
“stick” or accumulate for more than a few days due to the close
proximity of the sun.
Tip: Hot, black, leftover coffee
(straight from the pot, with nothing added) provides both warm
moisture and nutrients to the compost pile in winter.
Straw cover:
Straw makes excellent insulation for
compost piles in winter. Covering your compost and Hugelkultur piles
with straw insulates them from the cold so they can cook all winter.
You will have to remove the insulating straw from compost piles to
turn them. Still, it's well worth the effort in order to have your
compost done by spring.
Note: To add kitchen scraps in
the cold, simply make a hole in the straw, then re-cover. Till the
scraps in on warmer days.
Subscribe to:
Posts (Atom)